
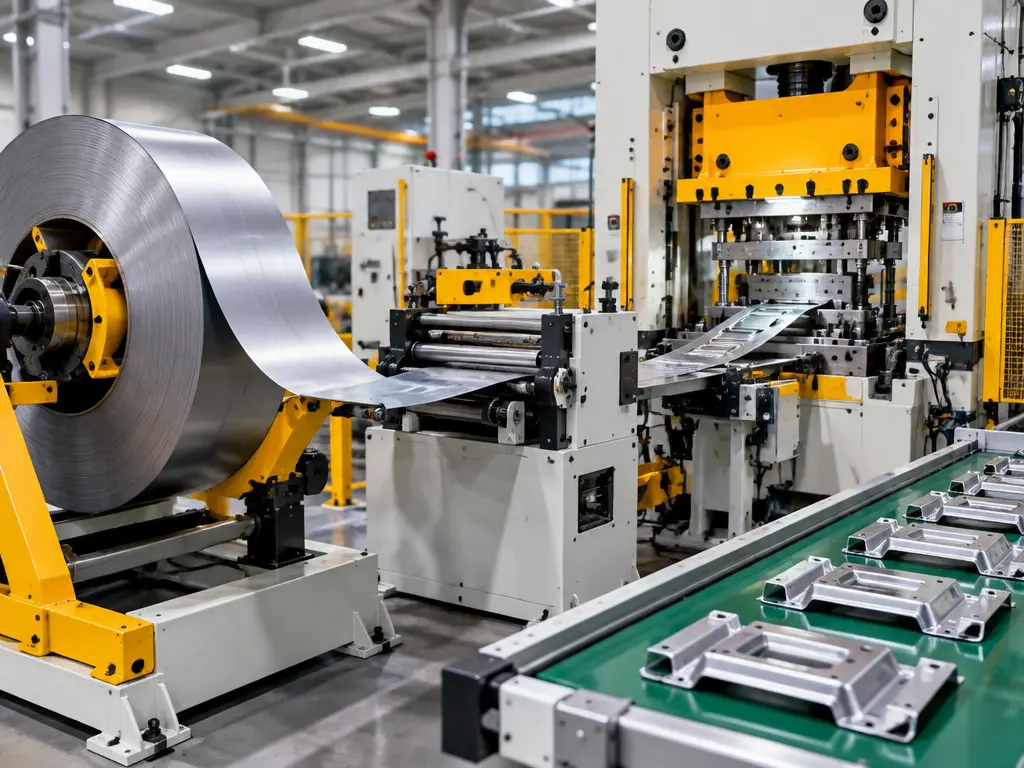
Building a stamping automation line is the single most impactful investment a press shop can make. Get the configuration right, and you’ll see throughput gains of 25–40%, consistent part quality, and labor costs cut by over half. However, get it wrong, and you’ll spend months troubleshooting a line that never reaches its promised output.
The good news? The basic architecture of a coil-fed stamping automation line has been refined over decades. Therefore, when you follow the right process, it’s a predictable, manageable project. For context on metal forming generally, see Wikipedia’s stamping article.
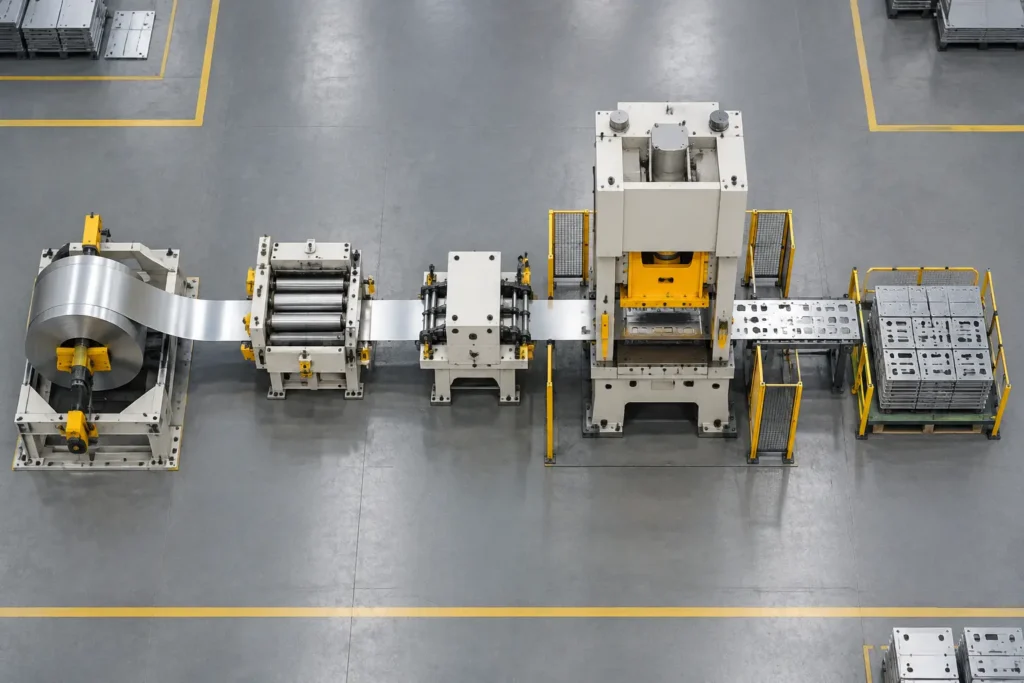
The Standard Coil-Fed Stamping Automation Line: 6 Stations
Every automated stamping line follows the same material flow:
Coil → Decoiling → Leveling → Servo Feeding → Press Stamping → Part HandlingStation 1: Coil Loading and Decoiling
The process starts with a decoiler (also called an uncoiler or material rack). This machine holds the coil on an expanding mandrel — either mechanical or hydraulic — and pays off strip material under controlled tension.
Key decisions: Coil weight capacity (500kg to 10 tons), mandrel type (manual vs hydraulic expansion), loading method (forklift vs coil car), single vs dual-head. Browse our decoilers category.
Station 2: Leveling (Straightening)
The strip passes through a leveling machine that removes coil-set curvature through reverse bending. Without proper leveling, curved strip misaligns in the die, causing scrap and tooling wear.
Key decisions: Number of leveling rolls (more = better flatness), roll diameter, backup roll configuration, manual vs motorized gap adjustment. See our coil leveler guide.
Station 3: Servo Feeding
The heart of the line. An NC servo feeder advances the leveled strip into the press die at precisely programmed intervals. The feeder’s accuracy and speed directly determine the line’s output.
Key decisions: Feed accuracy (±0.15mm for progressive dies), multi-stage capability, pilot release timing, integration with press encoder. View our feeders category.
Station 4: Press Stamping
The press itself — whether mechanical, hydraulic, or servo-driven — performs the actual forming operation. The feeding system must synchronize with the press crank angle to advance material only when the die is open.
Station 5: Part Handling (Robot or Eject)
Finished parts need to exit the press efficiently. Options range from simple air blow-off and gravity chutes to stamping robots that pick and stack parts onto pallets.
Station 6: Scrap Handling
Trim waste and skeleton material are collected via scrap choppers, belt conveyors, or bins beneath the press. In short, every station on a stamping automation line plays a specific role in keeping material moving.
Four Common Stamping Automation Line Configurations
Compact Line (3-in-1)
Best for: Shops with limited floor space, moderate coil sizes, diverse part mix.
The decoiler, leveler, and feeder are combined in one unit. In other words, one machine replaces three, saving ~40% floor space. Changeovers are faster because everything is controlled from a single HMI.
Jingcui’s NLF1 series (up to 800mm width, 7000kg coil) is this category’s workhorse — in fact, it’s often the first building block of a compact stamping automation line.
Modular Standard Line
Best for: Larger shops with dedicated long-run lines, heavy coils, or frequent format changes.
Separate decoiler, leveler, and feeder — each independently positioned. More floor space, but maximum flexibility. For example, if your leveler needs service, you don’t stop the decoiler.
High-Speed Progressive Line
Best for: High-volume stamping at 40–80 SPM, thin material, tight tolerances.
A precision leveler paired with a high-speed NC servo feeder, synchronized with the press via encoder feedback. May include loop control between leveler and feeder.
Robot-Integrated Production Cell
Best for: Shops running 3–10 presses that want one operator to oversee the entire cell.
A handling robot loads/unloads multiple presses while the feeding system runs autonomously. Jingcui’s 6-axis handling robot (10kg payload, ±0.05mm repeatability) is designed for exactly this scenario.
The Design Process: 6 Steps to a Working Stamping Automation Line
Step 1: Define the Material Window
What materials will this line run? List every grade, thickness, and width combination. Include the extremes — the lightest gauge at the widest width, or the thickest material at the fastest speed.
Step 2: Specify Coil Parameters
Coil weight, ID (typically 508mm), OD (up to 1200mm+), and loading method. These determine your decoiler capacity and whether you need a coil car.
Step 3: Match to Press
Press tonnage, bed size, bolster height, SPM range, crank angle signal type. The feeder and press must communicate — otherwise, mismatched interfaces cause no-feed faults and die crashes.
Step 4: Account for the Die
Feed pitch (min and max), number of pilot pins, pilot diameter, strip layout, and die shut height. The feeder’s pilot release function must be timed precisely to the die pilots.
Step 5: Plan the Floor Layout
Available floor space, feed direction (left-to-right or right-to-left), loading side, operator walkway, material staging area. Draw it. Even a rough sketch catches layout problems before equipment arrives.
Step 6: Design for the Future
Will you run different materials or wider strips in two years? Building in a margin of extra capacity now costs far less than replacing equipment later. A feeder with 600mm width capacity costs only slightly more than a 400mm unit — but replacing the 400mm unit later is a full capital expense.
Three Common Mistakes to Avoid
Mistake 1: Buying by price, not by specification. A cheap feeder with ±0.5mm accuracy will cost more in scrap and downtime within six months than a properly spec’d unit at ±0.15mm.
Mistake 2: Mixing brands without integration testing. If your decoiler is from one supplier and the feeder from another, who do you call when the line won’t synchronize? Single-supplier lines eliminate this headache.
Mistake 3: Ignoring future flexibility. Don’t spec the line for exactly your current job. Give yourself 20–30% headroom on width, thickness, and coil weight.
Jingcui’s Turnkey Approach
At Jingcui Automation, we don’t just ship individual machines — we deliver complete, tested stamping automation lines. Above all, our 22 years of experience in Shunde, Foshan means we’ve seen thousands of press room configurations, and we know what works.
Our process:
- Application review — You send us your material, coil, press, and die data
- Configuration proposal — We recommend the right equipment combination with verified compatibility
- Factory testing — Your line is assembled and tested in our factory before shipment
- Export packing and delivery — Properly crated for international transit
- On-site installation and training — Our engineers can travel to your location
Explore our turnkey solutions or see our factory tour. From a single NC servo feeder to a complete multi-press robot cell, one supplier, one warranty, one responsibility.
Frequently Asked Questions
What is a stamping automation line?
A stamping automation line is a configured sequence of equipment that moves material from coil to finished part automatically: a decoiler unwinds the coil, a leveler flattens it, a servo feeder advances it into the press, and a robot or ejector removes finished parts.
How many stations does a stamping automation line need?
A standard coil-fed line has six stations: coil loading/decoiling, leveling, servo feeding, press stamping, part handling, and scrap handling. Compact 3-in-1 lines combine the first three into one unit.
How much does a stamping automation line cost?
It depends on material width, thickness, automation level, and whether you include a robot. A 3-in-1 line can start around $12,000–$30,000, while a complete turnkey line with robot handling can run $40,000–$100,000+. See our coil feeding system cost guide for detailed ranges.
How long does it take to set up a stamping automation line?
Standard lines are typically installed in 1–2 shifts; complete turnkey lines with factory assembly and overseas installation take longer and are usually scheduled during the quoting process.
Can I automate an existing press line?
Yes. Most existing presses can be retrofitted with an NC servo feeder, a leveler, and part handling. Start with the feeding stage — see our NC servo feeder buying guide.
Ready to plan your stamping automation line?
Send Jingcui Automation your press specs, material data, and production targets. Our engineers will design a configuration that fits your space, your budget, and your growth plans.
📞 WhatsApp: +86 133 6064 4989 | 🌐 jingcuiautomation.com



Leave a Reply